A comparison of open-source no- and low-code platforms you can host yourself.
The use cases
I set myself two use cases as the goal:
- We build a web app that consumes data from an API and displays it in purpose-fit tables.
- We import tables from Excel files and want to display them smartly.
The candidates
With the help of AI and web search we find possible standard solutions.
| Name | Initial assessment after a quick look | License | Last commit | Contributors |
|---|---|---|---|---|
| Budibase | Many features locked in the community edition | Proprietary | 2 days | 120 |
| Tooljet | Many features locked in the community edition | AGPL-3.0 license | 2 days | 654 |
| Nocobase | Some features locked in the community edition | Proprietary | 5 days | 107 |
| Appsmith | Some features locked in the community edition | Apache-2.0 | 2 days | 342 |
| Baserow | Some features locked in the community edition | Proprietary | 2 days | 52 |
| Grommet | Different use case, drops out | - | ||
| Sail | Different use case, drops out | - | ||
| rowy | Different use case, drops out | - | ||
| Directus | Different use case, drops out | - |
Quick and dirty: live demos
We try all the tools out briefly.
For that we create corresponding Compose projects and then bring them up on our server – that gives the live demo.
Nocobase
Setting up Nocobase is very simple at first.
After the first start we are greeted by the login screen. The preset user is:
E-mail: admin@nocobase.com Password: admin123
At least the password we should change quickly.
Now we are logged in, and the sober start screen looks like this:
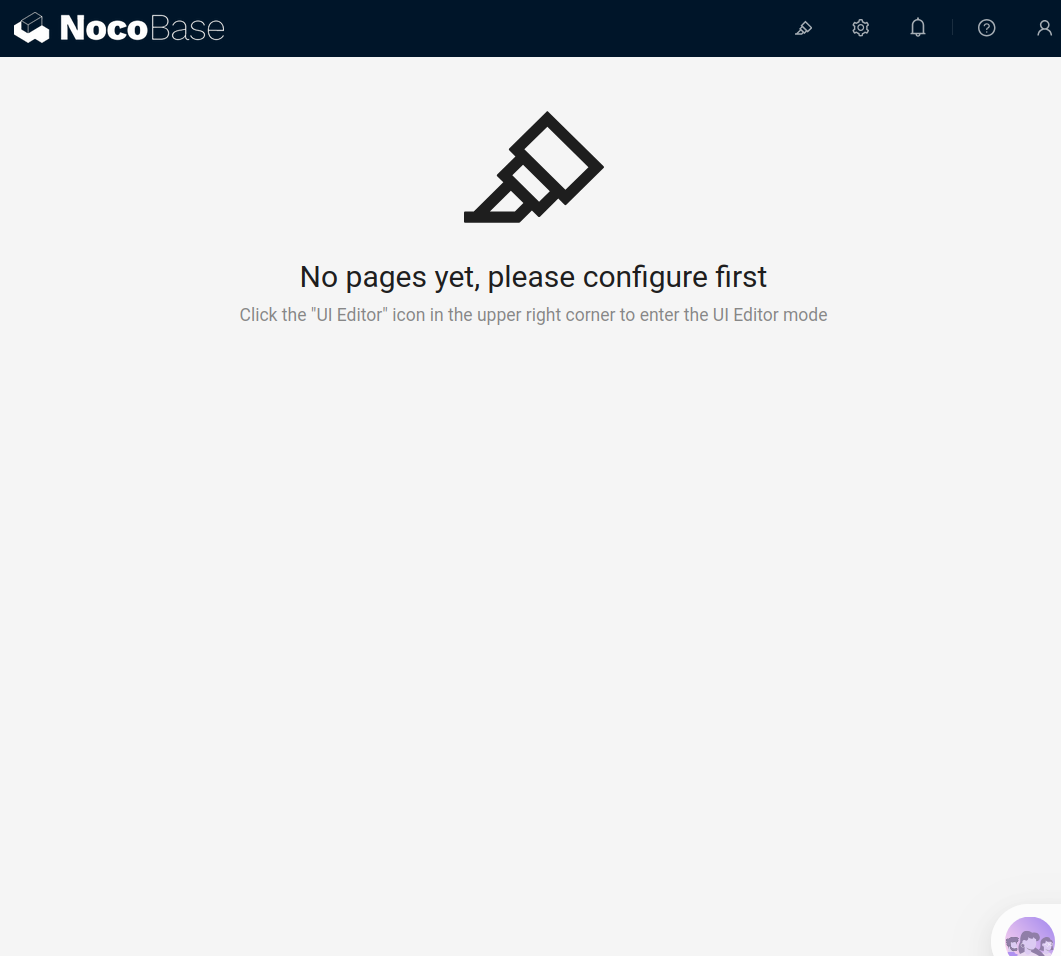
The details of the configuration are in the "Setup" sub-chapter; in the "Use Cases" chapter we look at the tool more closely then.
Setup
We create the subfolder "storage" beforehand.
compose.yml:
services:
    app:
        image: nocobase/nocobase:latest-full
        restart: unless-stopped
        networks:
            - default
            - caddy
        depends_on:
            - postgres
        environment:
            # The application's secret key, used to generate user tokens, etc.
            # If APP_KEY is changed, old tokens will also become invalid.
            # It can be any random string, and make sure it is not exposed.
            - APP_KEY=
            # Database type, supports postgres, mysql, mariadb
            - DB_DIALECT=postgres
            # Database host, can be replaced with the IP of an existing database server
            - DB_HOST=postgres
            # Database port
            - DB_PORT=5432
            # Database name
            - DB_DATABASE=nocobase
            # Database user
            - DB_USER=nocobase
            # Database password
            - DB_PASSWORD=
            # Timezone
            - TZ=Europe/Berlin
        volumes:
            - ./storage:/app/nocobase/storage
        labels:
            - "traefik.enable=true"
            - "traefik.docker.network=caddy"
            - "traefik.http.routers.noco.rule=Host(`nocobase.handtrixxx.com`)"
            - "traefik.http.routers.noco.entrypoints=websecure"
            - "traefik.http.routers.noco.tls.certresolver=letsencrypt"
            - "traefik.http.routers.noco.service=noco"
            - "traefik.http.routers.noco-http.rule=Host(`nocobase.handtrixxx.com`)"
            - "traefik.http.routers.noco-http.entrypoints=web"
            - "traefik.http.routers.noco-http.middlewares=https-redirect"
            - "traefik.http.routers.noco-http.service=noco"
            - "traefik.http.middlewares.https-redirect.redirectscheme.scheme=https"
            - "traefik.http.middlewares.https-redirect.redirectscheme.permanent=true"
            - "traefik.http.services.noco.loadbalancer.server.port=80"
        #ports:
        #    - "13000:80"
        # init: true

    # If using an existing database server, postgres service can be omitted
    postgres:
        image: postgres:16
        restart: unless-stopped
        command: postgres -c wal_level=logical
        environment:
            POSTGRES_USER: nocobase
            POSTGRES_DB: nocobase
            POSTGRES_PASSWORD:
        volumes:
            - ./storage/db/postgres:/var/lib/postgresql/data
        networks:
            - default
networks:
    caddy:
        external: true
Appsmith
Appsmith too is very easy to set up.
After the first start we are greeted by an assistant, via which we set up our first user.
Directly afterwards we are already asked for a data source to connect:
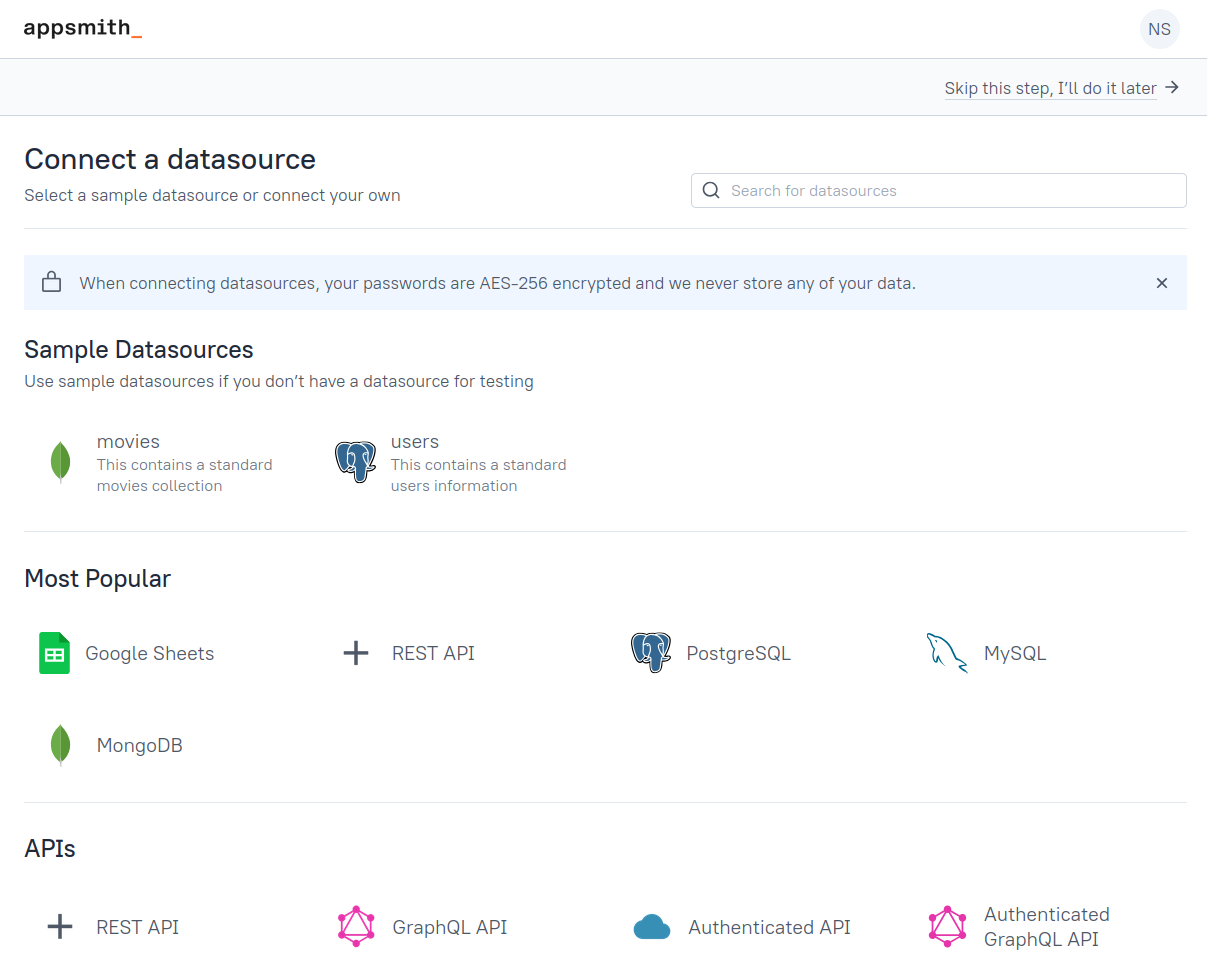
This step we skip for now.
Then we land directly in an app designer:
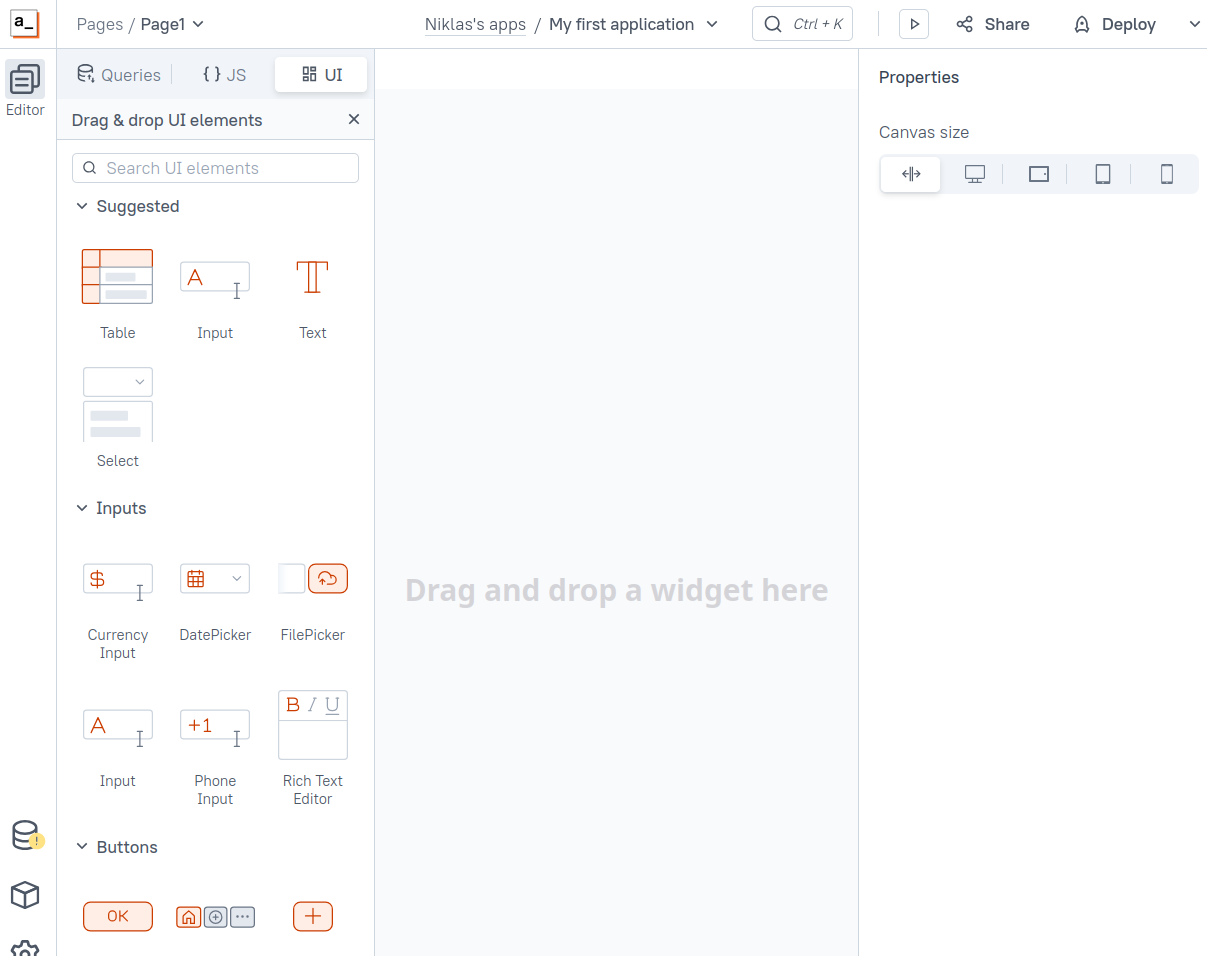
The details of the configuration are in the "Setup" sub-chapter; in the "Use Cases" chapter we look at the tool more closely then.
Setup
We create the subfolder "stacks" beforehand.
compose.yml
services:
    appsmith:
        image: index.docker.io/appsmith/appsmith-ce
        container_name: appsmith
        #ports:
        #    - "80:80"
        #    - "443:443"
        volumes:
            - ./stacks:/appsmith-stacks
        networks:
            - caddy
        restart: unless-stopped
        labels:
            - com.getarcaneapp.arcane.updater=false
            - "traefik.enable=true"
            - "traefik.docker.network=caddy"
            - "traefik.http.routers.appsmith.rule=Host(`appsmith.handtrixxx.com`)"
            - "traefik.http.routers.appsmith.entrypoints=websecure"
            - "traefik.http.routers.appsmith.tls.certresolver=letsencrypt"
            - "traefik.http.routers.appsmith.service=appsmith"
            - "traefik.http.routers.appsmith-http.rule=Host(`appsmith.handtrixxx.com`)"
            - "traefik.http.routers.appsmith-http.entrypoints=web"
            - "traefik.http.routers.appsmith-http.middlewares=https-redirect"
            - "traefik.http.routers.appsmith-http.service=appsmith"
            - "traefik.http.middlewares.https-redirect.redirectscheme.scheme=https"
            - "traefik.http.middlewares.https-redirect.redirectscheme.permanent=true"
            - "traefik.http.services.appsmith.loadbalancer.server.port=80"
networks:
    caddy:
        external: true
Tooljet
Tooljet offers many options for setup.
After the first start we are greeted by an assistant, via which we set up our first user.
The UI of the system looks more modern than e.g. at Appsmith or Nocobase and greets us with an assistant that asks us what we want to do next:
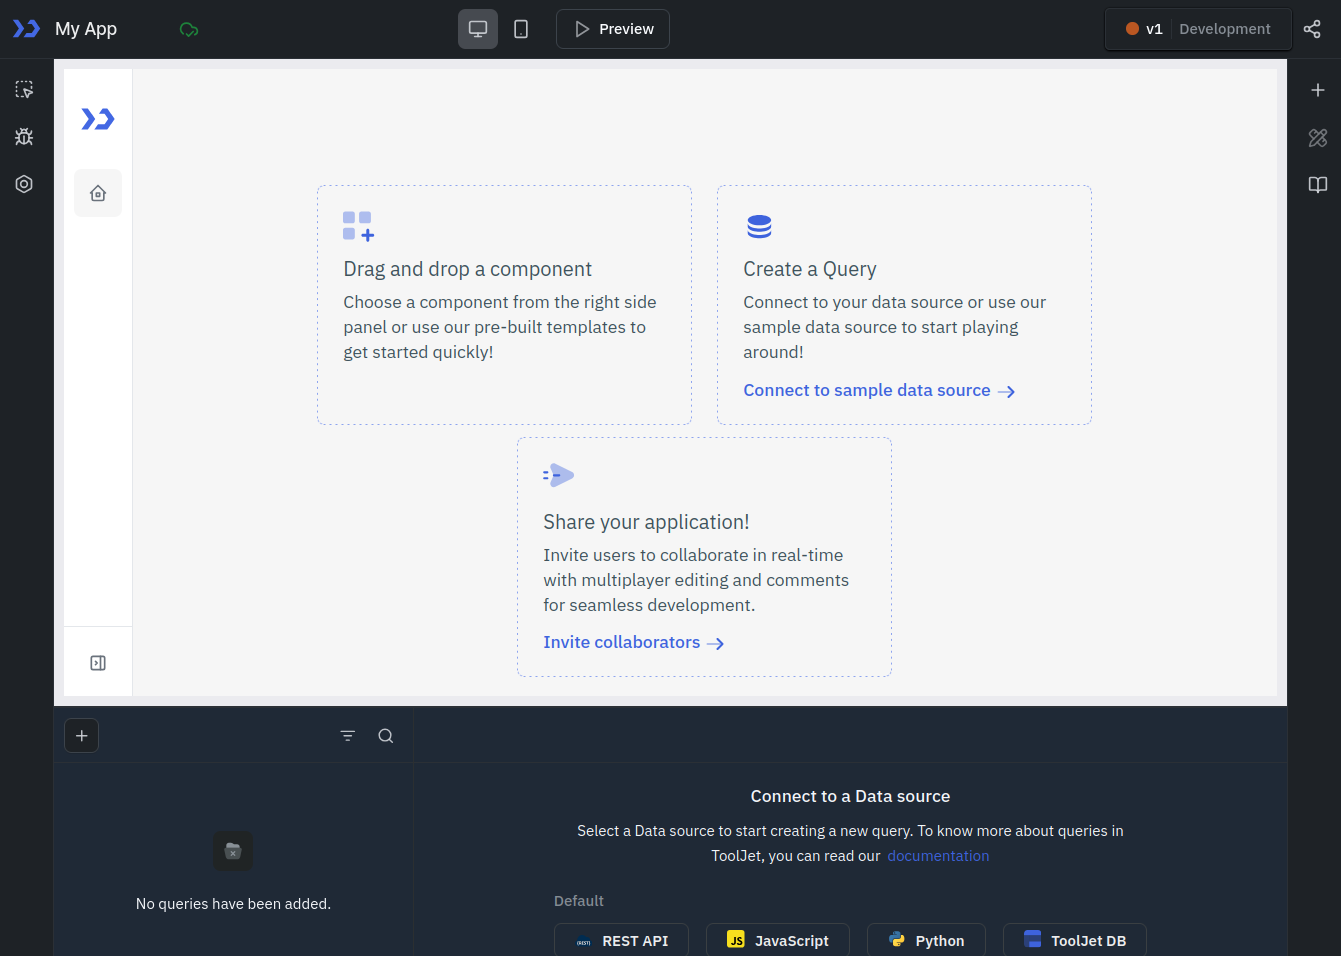
The details of the configuration are in the "Setup" sub-chapter; in the "Use Cases" chapter we look at the tool more closely then.
Setup
In the end a compose.yml and a .env file are to be created, as well as a subfolder "postgres_data".
compose.yml
name: Tooljet app

services:
    tooljet:
        tty: true
        stdin_open: true
        container_name: Tooljet-app
        image: tooljet/tooljet-ce:ce-lts-latest
        platform: linux/amd64
        restart: always
        env_file: .env
        #ports:
        #  - 80:80
        networks:
            - default
            - caddy
        depends_on:
            - postgres
        environment:
            SERVE_CLIENT: "true"
            PORT: "80"
        command: npm run start:prod
        labels:
            - "traefik.enable=true"
            - "traefik.docker.network=caddy"
            - "traefik.http.routers.tooljet.rule=Host(`tooljet.handtrixxx.com`)"
            - "traefik.http.routers.tooljet.entrypoints=websecure"
            - "traefik.http.routers.tooljet.tls.certresolver=letsencrypt"
            - "traefik.http.routers.tooljet.service=tooljet"
            - "traefik.http.routers.tooljet-http.rule=Host(`tooljet.handtrixxx.com`)"
            - "traefik.http.routers.tooljet-http.entrypoints=web"
            - "traefik.http.routers.tooljet-http.middlewares=https-redirect"
            - "traefik.http.routers.tooljet-http.service=tooljet"
            - "traefik.http.middlewares.https-redirect.redirectscheme.scheme=https"
            - "traefik.http.middlewares.https-redirect.redirectscheme.permanent=true"
            - "traefik.http.services.tooljet.loadbalancer.server.port=80"

    postgres:
        container_name: ${PG_HOST}
        image: postgres:16
        restart: always
        volumes:
            - postgres:/var/lib/postgresql/data
        env_file: .env
        environment:
            - POSTGRES_USER=${PG_USER}
            - POSTGRES_PASSWORD=${PG_PASS}
        networks:
            - default

networks:
    default:
    caddy:
        external: true

volumes:
    postgres:
        driver: local
        driver_opts:
            o: bind
            type: none
            device: ${PWD}/postgres_data
    certs:
    logs:
    fallbackcerts:
.env
# Create .env from this example file and replace values for the environment.
# The application expects a separate .env.test for test environment configuration
# Get detailed information about each variable here: https://docs.tooljet.com/docs/setup/env-vars

TOOLJET_HOST=https://tooljet.handtrixxx.com
LOCKBOX_MASTER_KEY=
SECRET_KEY_BASE=

# DATABASE CONFIG
ORM_LOGGING=all
PG_DB=tooljet_production
PG_USER=postgres
PG_HOST=postgresql
PG_PASS=

# The above postgres values is set to its default state. If necessary, kindly modify it according to your personal preference.

# TOOLJET DATABASE
TOOLJET_DB=tooljet_db
TOOLJET_DB_USER=postgres
TOOLJET_DB_HOST=postgresql
TOOLJET_DB_PASS=

PGRST_DB_URI=postgres://postgres:TfNNf9qb5ScO4MZf@postgresql/tooljet_db
PGRST_HOST=localhost:3002
PGRST_JWT_SECRET=
PGRST_SERVER_PORT=3002
PGRST_DB_PRE_CONFIG=postgrest.pre_config

# Checks every 24 hours to see if a new version of ToolJet is available
# (Enabled by default. Set false to disable)
CHECK_FOR_UPDATES=true

# Checks every 24 hours to update app telemetry data to ToolJet hub.
# (Telemetry is enabled by default. Set value to true to disable.)
# DISABLE_TOOLJET_TELEMETRY=false

GOOGLE_CLIENT_ID=
GOOGLE_CLIENT_SECRET=

# EMAIL CONFIGURATION
DEFAULT_FROM_EMAIL=hello@tooljet.io
SMTP_USERNAME=
SMTP_PASSWORD=
SMTP_DOMAIN=
SMTP_PORT=

# DISABLE USER SIGNUPS (true or false). only applicable if Multi-Workspace feature is enabled
DISABLE_SIGNUPS=

# OBSERVABILITY
APM_VENDOR=
SENTRY_DNS=
SENTRY_DEBUG=

# FEATURE TOGGLE
COMMENT_FEATURE_ENABLE=
ENABLE_MULTIPLAYER_EDITING=true
ENABLE_MARKETPLACE_FEATURE=true

# SSO (Applicable only for Multi-Workspace)
SSO_GOOGLE_OAUTH2_CLIENT_ID=
SSO_GIT_OAUTH2_CLIENT_ID=
SSO_GIT_OAUTH2_CLIENT_SECRET=
SSO_GIT_OAUTH2_HOST=
SSO_ACCEPTED_DOMAINS=
SSO_DISABLE_SIGNUPS=

#ONBOARDING
ENABLE_ONBOARDING_QUESTIONS_FOR_ALL_SIGN_UPS=

#session expiry in minutes
USER_SESSION_EXPIRY=2880

#TELEMETRY
DEPLOYMENT_PLATFORM=docker

# Workflow scheduling configuration
# Worker Mode
# Set to 'true' to enable job processing
# Set to 'false' or unset for HTTP-only mode (scaled deployments)
WORKER=true

# Workflow Processor Concurrency (optional)
# Number of workflow jobs processed concurrently per worker
# Default: 5
TOOLJET_WORKFLOW_CONCURRENCY=5

# Workflow Execution Timeout (optional)
# Maximum time (in seconds) for a workflow to execute
# Default: 60 seconds
WORKFLOW_TIMEOUT_SECONDS=60
Baserow
Baserow likewise is very easy to set up.
After the first start we are greeted by an assistant, via which we set up our first user. Besides the assistant creates a sample application based on typical scenarios that we may choose from.
The whole thing can be skipped at some point, and the start screen we then see looks like this:
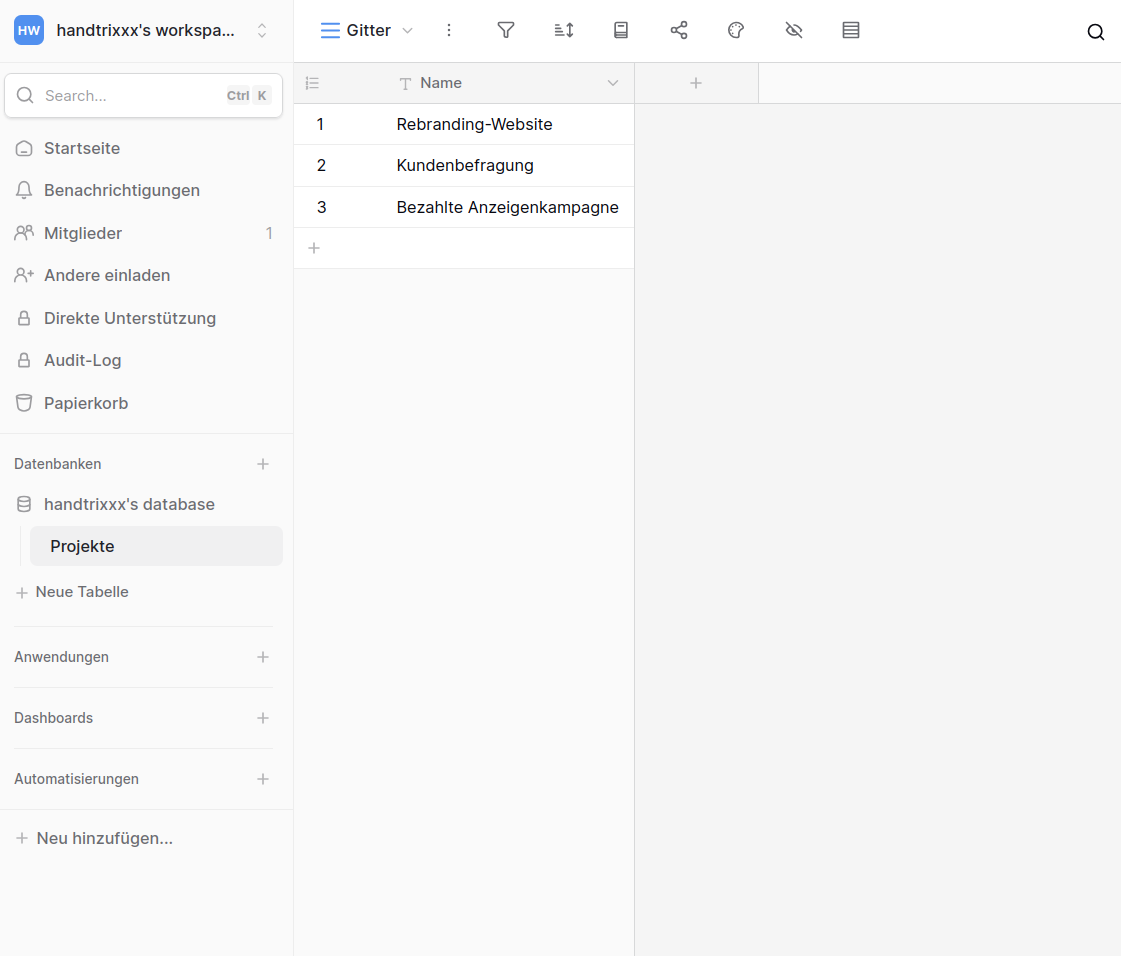
The details of the configuration are in the "Setup" sub-chapter; in the "Use Cases" chapter we look at the tool more closely then.
Setup
compose.yml
The subdirectory "data" one should create beforehand.
services:
    baserow:
        container_name: baserow
        image: baserow/baserow:2.1.6
        environment:
            BASEROW_PUBLIC_URL: "https://baserow.handtrixxx.com"
        #ports:
        #  - "80:80"
        #  - "443:443"
        volumes:
            - ./data:/baserow/data
        networks:
            - caddy
        labels:
            - "traefik.enable=true"
            - "traefik.docker.network=caddy"
            - "traefik.http.routers.baserow.rule=Host(`baserow.handtrixxx.com`)"
            - "traefik.http.routers.baserow.entrypoints=websecure"
            - "traefik.http.routers.baserow.tls.certresolver=letsencrypt"
            - "traefik.http.routers.baserow.service=baserow"
            - "traefik.http.routers.baserow-http.rule=Host(`baserow.handtrixxx.com`)"
            - "traefik.http.routers.baserow-http.entrypoints=web"
            - "traefik.http.routers.baserow-http.middlewares=https-redirect"
            - "traefik.http.routers.baserow-http.service=baserow"
            - "traefik.http.middlewares.https-redirect.redirectscheme.scheme=https"
            - "traefik.http.middlewares.https-redirect.redirectscheme.permanent=true"
            - "traefik.http.services.baserow.loadbalancer.server.port=80"
networks:
    caddy:
        external: true
Budibase
Budibase is somewhat more complicated, but likewise doable.
After the first start we are greeted by the login screen, where we log in with the user specified in the .env file.
Shortly afterwards the modern-looking start interface of the tool greets us:
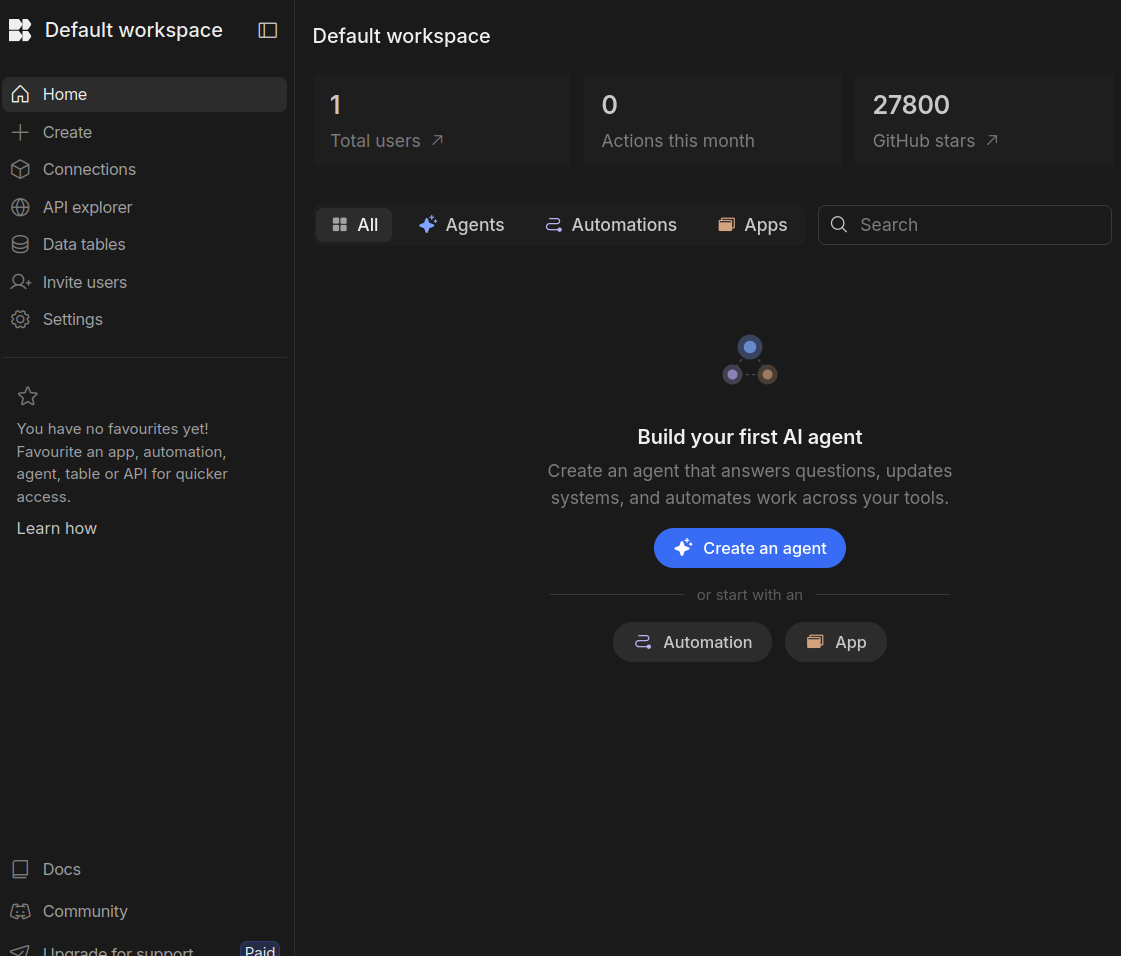
The details of the configuration are in the "Setup" sub-chapter; in the "Use Cases" chapter we look at the tool more closely then.
Setup
compose.yml
The labels are only required if one wants to use Traefik.
services:
    app-service:
        restart: unless-stopped
        image: budibase/apps:latest
        container_name: bbapps
        networks:
            - default
        environment:
            SELF_HOSTED: 1
            COUCH_DB_URL: http://${COUCH_DB_USER}:${COUCH_DB_PASSWORD}@couchdb-service:5984
            WORKER_URL: http://worker-service:4003
            MINIO_URL: http://minio-service:9000
            MINIO_ACCESS_KEY: ${MINIO_ACCESS_KEY}
            MINIO_SECRET_KEY: ${MINIO_SECRET_KEY}
            INTERNAL_API_KEY: ${INTERNAL_API_KEY}
            BUDIBASE_ENVIRONMENT: ${BUDIBASE_ENVIRONMENT}
            PORT: 4002
            API_ENCRYPTION_KEY: ${API_ENCRYPTION_KEY}
            JWT_SECRET: ${JWT_SECRET}
            LOG_LEVEL: info
            ENABLE_ANALYTICS: "true"
            REDIS_URL: redis-service:6379
            REDIS_PASSWORD: ${REDIS_PASSWORD}
            REDIS_USERNAME: ${REDIS_USERNAME:-}
            LITELLM_URL: http://litellm-service:4000
            LITELLM_MASTER_KEY: ${LITELLM_MASTER_KEY}
            BB_ADMIN_USER_EMAIL: ${BB_ADMIN_USER_EMAIL}
            BB_ADMIN_USER_PASSWORD: ${BB_ADMIN_USER_PASSWORD}
            PLUGINS_DIR: ${PLUGINS_DIR}
            OFFLINE_MODE: ${OFFLINE_MODE:-}
        depends_on:
            - worker-service
            - redis-service
            - litellm-service
    #    volumes:
    #      - /some/path/to/plugins:/plugins

    worker-service:
        restart: unless-stopped
        image: budibase/worker
        container_name: bbworker
        networks:
            - default
        environment:
            SELF_HOSTED: 1
            PORT: 4003
            CLUSTER_PORT: ${MAIN_PORT}
            API_ENCRYPTION_KEY: ${API_ENCRYPTION_KEY}
            JWT_SECRET: ${JWT_SECRET}
            MINIO_ACCESS_KEY: ${MINIO_ACCESS_KEY}
            MINIO_SECRET_KEY: ${MINIO_SECRET_KEY}
            MINIO_URL: http://minio-service:9000
            APPS_URL: http://app-service:4002
            COUCH_DB_USERNAME: ${COUCH_DB_USER}
            COUCH_DB_PASSWORD: ${COUCH_DB_PASSWORD}
            COUCH_DB_URL: http://${COUCH_DB_USER}:${COUCH_DB_PASSWORD}@couchdb-service:5984
            INTERNAL_API_KEY: ${INTERNAL_API_KEY}
            REDIS_URL: redis-service:6379
            REDIS_PASSWORD: ${REDIS_PASSWORD}
            REDIS_USERNAME: ${REDIS_USERNAME:-}
            LITELLM_URL: http://litellm-service:4000
            LITELLM_MASTER_KEY: ${LITELLM_MASTER_KEY}
            OFFLINE_MODE: ${OFFLINE_MODE:-}
        depends_on:
            - redis-service
            - minio-service
            - litellm-service

    minio-service:
        restart: unless-stopped
        image: minio/minio
        networks:
            - default
        volumes:
            - ./minio_data:/data
        environment:
            MINIO_ACCESS_KEY: ${MINIO_ACCESS_KEY}
            MINIO_SECRET_KEY: ${MINIO_SECRET_KEY}
            MINIO_BROWSER: "off"
        command: server /data --console-address ":9001"
        healthcheck:
            test: "timeout 5s bash -c ':> /dev/tcp/127.0.0.1/9000' || exit 1"
            interval: 30s
            timeout: 20s
            retries: 3

    proxy-service:
        restart: unless-stopped
        #ports:
        #    - "${MAIN_PORT}:10000"
        container_name: bbproxy
        image: budibase/proxy
        networks:
            - default
            - caddy
        environment:
            - PROXY_RATE_LIMIT_WEBHOOKS_PER_SECOND=10
            - PROXY_RATE_LIMIT_API_PER_SECOND=50
            - APPS_UPSTREAM_URL=http://app-service:4002
            - WORKER_UPSTREAM_URL=http://worker-service:4003
            - MINIO_UPSTREAM_URL=http://minio-service:9000
            - COUCHDB_UPSTREAM_URL=http://couchdb-service:5984
            - RESOLVER=127.0.0.11
        depends_on:
            - minio-service
            - worker-service
            - app-service
            - couchdb-service
        labels:
            - "traefik.enable=true"
            - "traefik.docker.network=caddy"
            - "traefik.http.routers.buddy.rule=Host(`buddy.handtrixxx.com`)"
            - "traefik.http.routers.buddy.entrypoints=websecure"
            - "traefik.http.routers.buddy.tls.certresolver=letsencrypt"
            - "traefik.http.routers.buddy.service=buddy"
            - "traefik.http.routers.buddy-http.rule=Host(`buddy.handtrixxx.com`)"
            - "traefik.http.routers.buddy-http.entrypoints=web"
            - "traefik.http.routers.buddy-http.middlewares=https-redirect"
            - "traefik.http.routers.buddy-http.service=buddy"
            - "traefik.http.middlewares.https-redirect.redirectscheme.scheme=https"
            - "traefik.http.middlewares.https-redirect.redirectscheme.permanent=true"
            - "traefik.http.services.buddy.loadbalancer.server.port=10000"
    couchdb-service:
        restart: unless-stopped
        image: budibase/database:2.1.0
        networks:
            - default
        environment:
            - COUCHDB_PASSWORD=${COUCH_DB_PASSWORD}
            - COUCHDB_USER=${COUCH_DB_USER}
            - TARGETBUILD=docker-compose
            - DATA_DIR=/data
        volumes:
            - ./couchdb3_data:/data

    redis-service:
        restart: unless-stopped
        image: redis
        networks:
            - default
        command: redis-server --requirepass "${REDIS_PASSWORD}"
        volumes:
            - ./redis_data:/data

    litellm-service:
        restart: unless-stopped
        image: docker.litellm.ai/berriai/litellm:1.80.15-stable.1
        #ports:
        #    - "${LITELLM_PORT:-4000}:4000"
        volumes:
            - ./litellm_config.yaml:/app/config.yaml
        environment:
            DATABASE_URL: "postgresql://${LITELLM_DB_USER}:${LITELLM_DB_PASSWORD}@litellm-db:5432/${LITELLM_DB_NAME}"
            STORE_MODEL_IN_DB: "True"
            LITELLM_REASONING_AUTO_SUMMARY: "true"
            LITELLM_MASTER_KEY: ${LITELLM_MASTER_KEY}
            LITELLM_SALT_KEY: ${LITELLM_SALT_KEY}
        command: ["--config", "/app/config.yaml"]
        depends_on:
            - litellm-db
        networks:
            - default
        healthcheck:
            test:
                [
                    "CMD-SHELL",
                    "wget --no-verbose --tries=1 http://localhost:4000/health/liveliness || exit 1",
                ]
            interval: 30s
            timeout: 10s
            retries: 3
            start_period: 40s

    litellm-db:
        restart: unless-stopped
        image: postgres:16
        environment:
            POSTGRES_DB: ${LITELLM_DB_NAME}
            POSTGRES_USER: ${LITELLM_DB_USER}
            POSTGRES_PASSWORD: ${LITELLM_DB_PASSWORD}
        volumes:
            - ./litellm_data:/var/lib/postgresql/data
        networks:
            - default
        healthcheck:
            test:
                [
                    "CMD-SHELL",
                    "pg_isready -d ${LITELLM_DB_NAME} -U ${LITELLM_DB_USER}",
                ]
            interval: 1s
            timeout: 5s
            retries: 10
networks:
    caddy:
        external: true
.env
Even though the REDIS_USERNAME can be set, the application then does not come up without further intervention. So we leave this commented out for now.
# Use the main port in the builder for your self hosting URL, e.g. localhost:10000
MAIN_PORT=10000

# This section contains all secrets pertaining to the system
# These should be updated
# #openssl rand -hex 32

API_ENCRYPTION_KEY=
JWT_SECRET=
MINIO_ACCESS_KEY=
MINIO_SECRET_KEY=
COUCH_DB_PASSWORD=
COUCH_DB_USER=
REDIS_PASSWORD=
#REDIS_USERNAME=budiredis
INTERNAL_API_KEY=
LITELLM_MASTER_KEY=
LITELLM_SALT_KEY=
# This section contains variables that do not need to be altered under normal circumstances
APP_PORT=4002
WORKER_PORT=4003
MINIO_PORT=4004
COUCH_DB_PORT=4005
COUCH_DB_SQS_PORT=4006
REDIS_PORT=6379
BUDIBASE_ENVIRONMENT=PRODUCTION
SQL_MAX_ROWS=
LITELLM_PORT=4000
LITELLM_DB_NAME=litellm
LITELLM_DB_USER=llmproxy
LITELLM_DB_PASSWORD=

# An admin user can be automatically created initially if these are set
BB_ADMIN_USER_EMAIL=
BB_ADMIN_USER_PASSWORD=

# A path that is watched for plugin bundles. Any bundles found are imported automatically/
PLUGINS_DIR=
ROLLING_LOG_MAX_SIZE=
litellm_config.yaml
Without this file Budibase does not come up, but the content only needs to be semantically correct. So the following example values can simply be taken over 1:1.
model_list:
    - model_name: azure-gpt-4o
      litellm_params:
          model: azure/<your-azure-model-deployment>
          api_base: os.environ/AZURE_API_BASE # runs os.getenv("AZURE_API_BASE")
          api_key: os.environ/AZURE_API_KEY # runs os.getenv("AZURE_API_KEY")
          api_version: "2025-01-01-preview"
Use Case 1
We build a web app that consumes data from an API and displays it in purpose-fit tables.
As the source we use the Stromberg API from https://stromberg-api.de/.
Via a GET request to https://stromberg-api.de/api/quotes we get a JSON response with the following schema.
We then want to display this response in the tool as a nice table in which one can sort and filter the fields.
Tooljet
First we create a new app with an arbitrary name, and then we can directly create a so-called "Query", where "Rest-API" is available to us as a source.
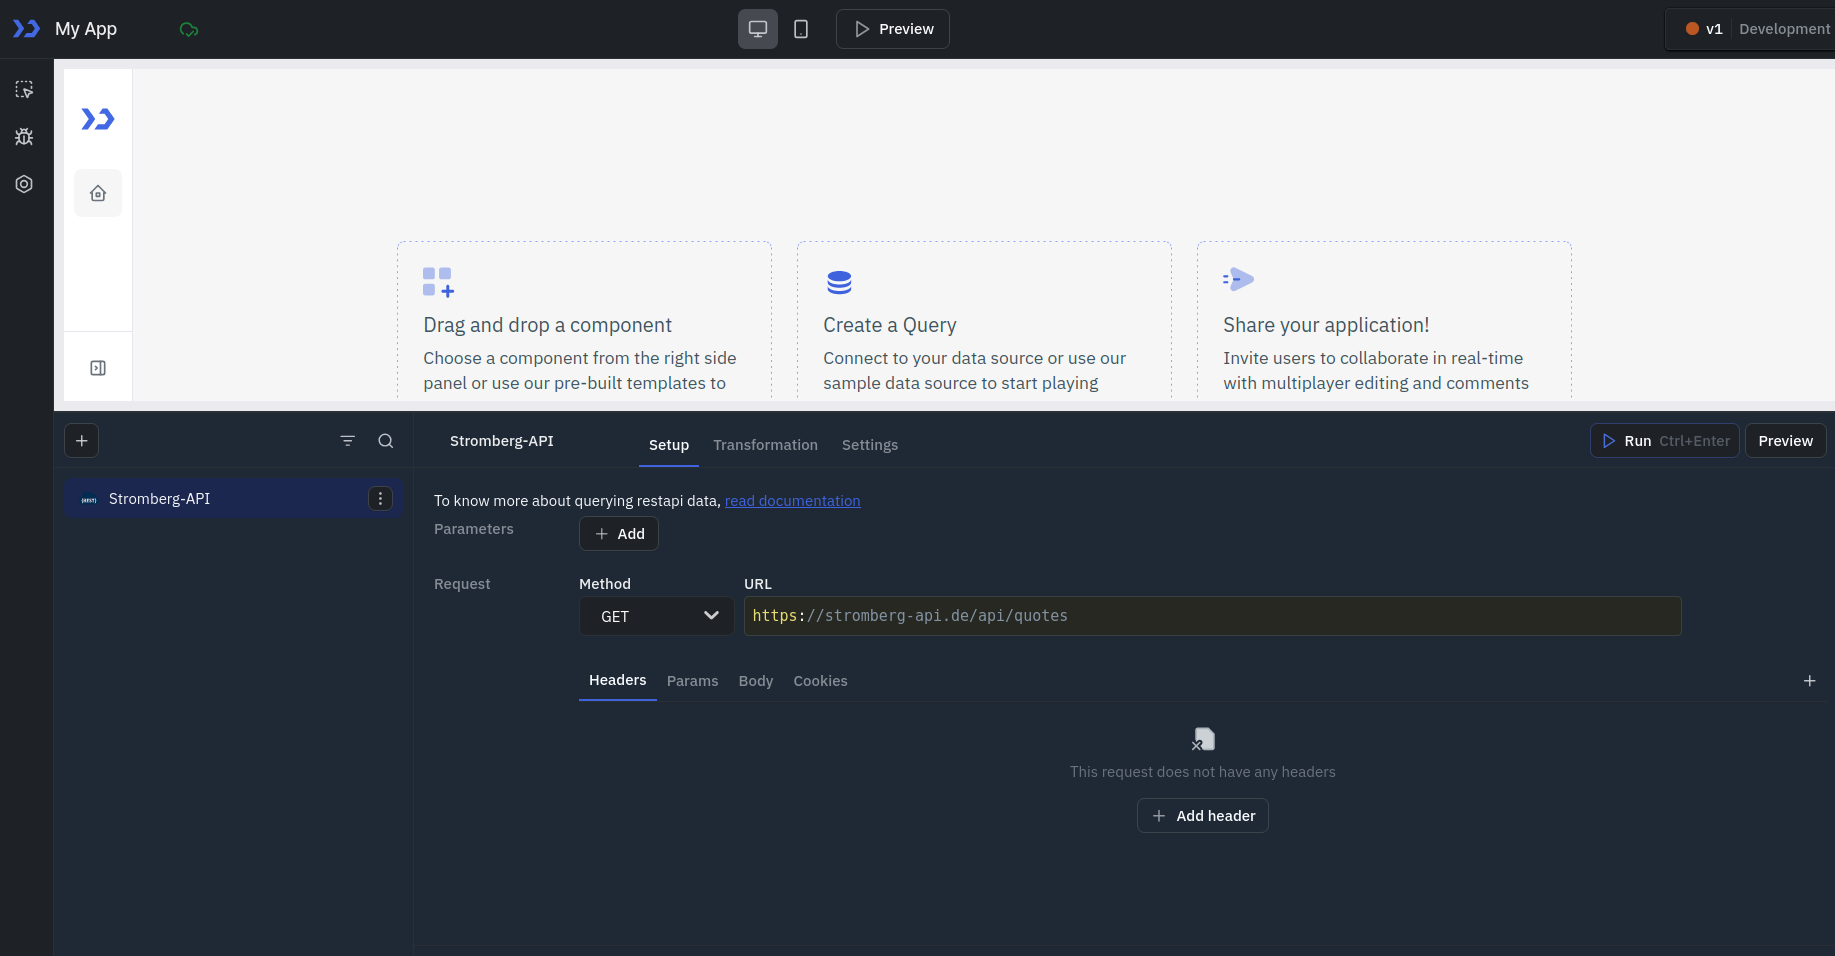
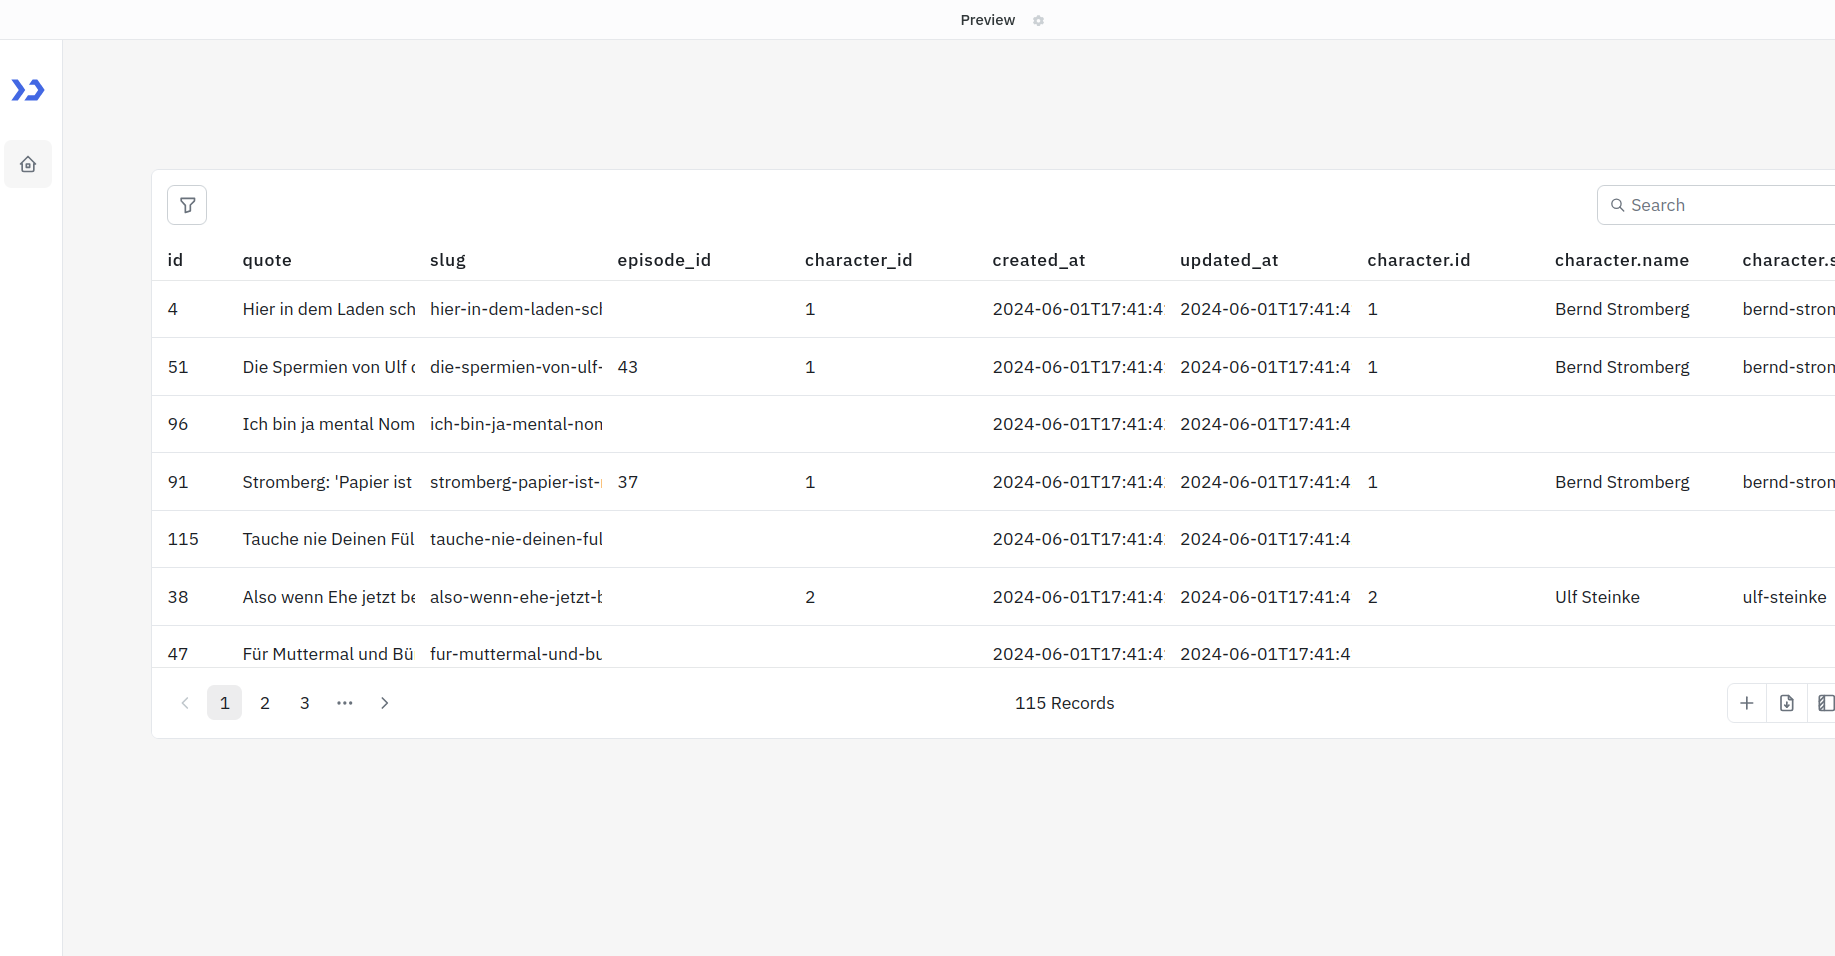
That was already almost the hardest part. Via the component library on the right we add a table to our app and select the previously defined endpoint for it.
Then one can still configure everything possible and publish the "app" either internally or freely accessible on the internet.
That is great: the use case was fulfilled 100 % in 7 minutes.
Budibase
After the positive experience with Tooljet, directly continuing with Budibase.
The first thing one notices are the omnipresent reminders and prompts to switch to another, paid plan. Not nice – so less a community project than rather a company behind it.
To add an API source that is not contained in the – admittedly considerable large – standard catalog, one selects "Create custom" in the dialog.
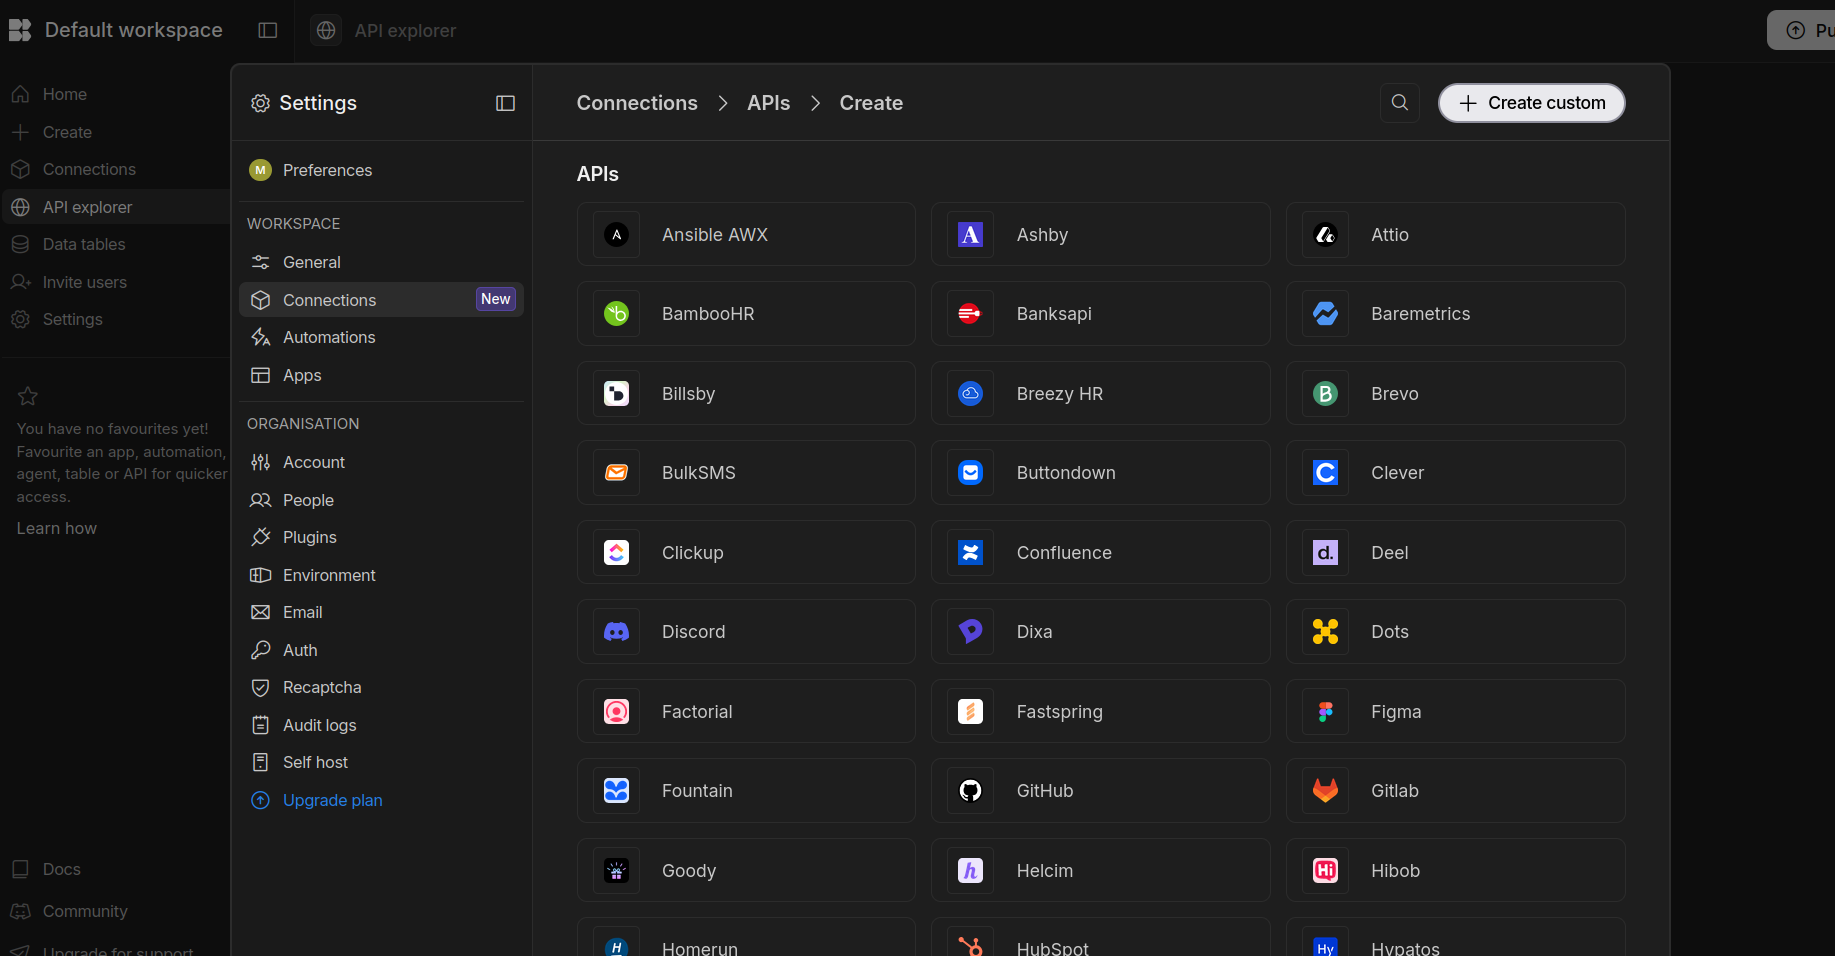
Afterwards however it goes just as quickly as with Tooljet.
Equally very good – if it were somewhat more transparent which functions are not available in the community edition, or are simply not displayed at all, it would also be 100 %. So rather 90 % because of the bad gut feeling.
Appsmith
With Appsmith too our use case can be fulfilled in a few minutes. The result lies somewhere between the very positive impressions of Budibase and Tooljet.
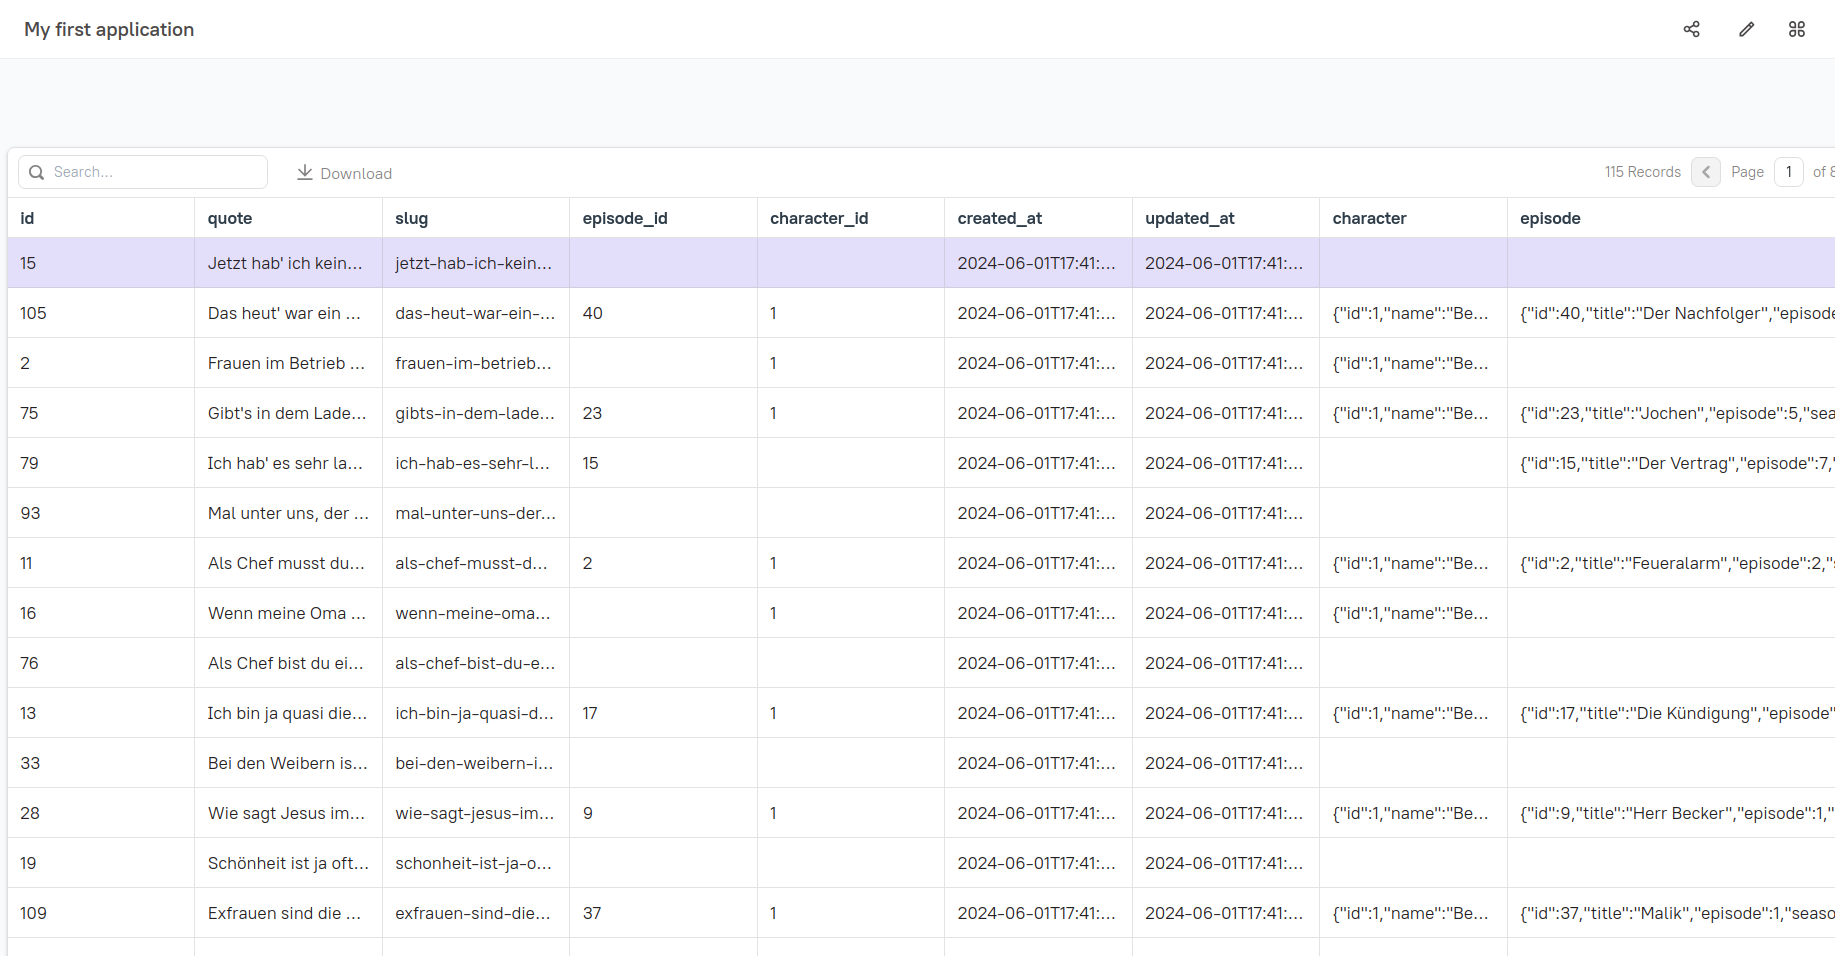
On one hand the UI looks somewhat more "old-school", and I did not find the filter function at first try; on the other hand the Appsmith table displays the contents of a column even when it is an object.
Therefore overall an assessment of 95 %.
Nocobase
The first surprise with Nocobase: after the standard installation initially no external data source can be defined at all. And even after reading the documentation the result remains sobering. Because about the API data source it is written:
This is a commercial plugin. For detailed activation instructions, please refer to: Commercial Plugin Activation Guide
With that this use case is done for us within the scope of our test.
Thereby an assessment of 0 %.
Baserow
Similar continues at Baserow. Here it even seems to be that the use of an external data source is not foreseen at all. I.e. it is actually a database management system with a GUI for applications.
Therefore also here for this use case an assessment of 0 %.
Summary of the assessment
- Tooljet: 100 %
- Budibase: 90 %
- Appsmith: 95 %
- Nocobase: 0 %
- Baserow: 0 %
So the winner with very close runners-up here is Tooljet.
Use Case 2
We import tables from Excel files and want to display them smartly.
As the basis we take an Excel export of the table previously imported via the API.
Budibase
A direct Excel import is not possible; .csv and .json work.
That means that on a client we first have to bring our Excel file into the .csv format.
Now we have two options:
- We create a new table, define the columns and their data types; or
- We create a new table and during creation select the .csv file as the import source. Here Budibase tries to recognize the columns and their content automatically.
Since option 2 saves work, I tested this – and it worked surprisingly well.
Afterwards we can then use this table as a data source analogously to use case 1 for a display of the data as a table.
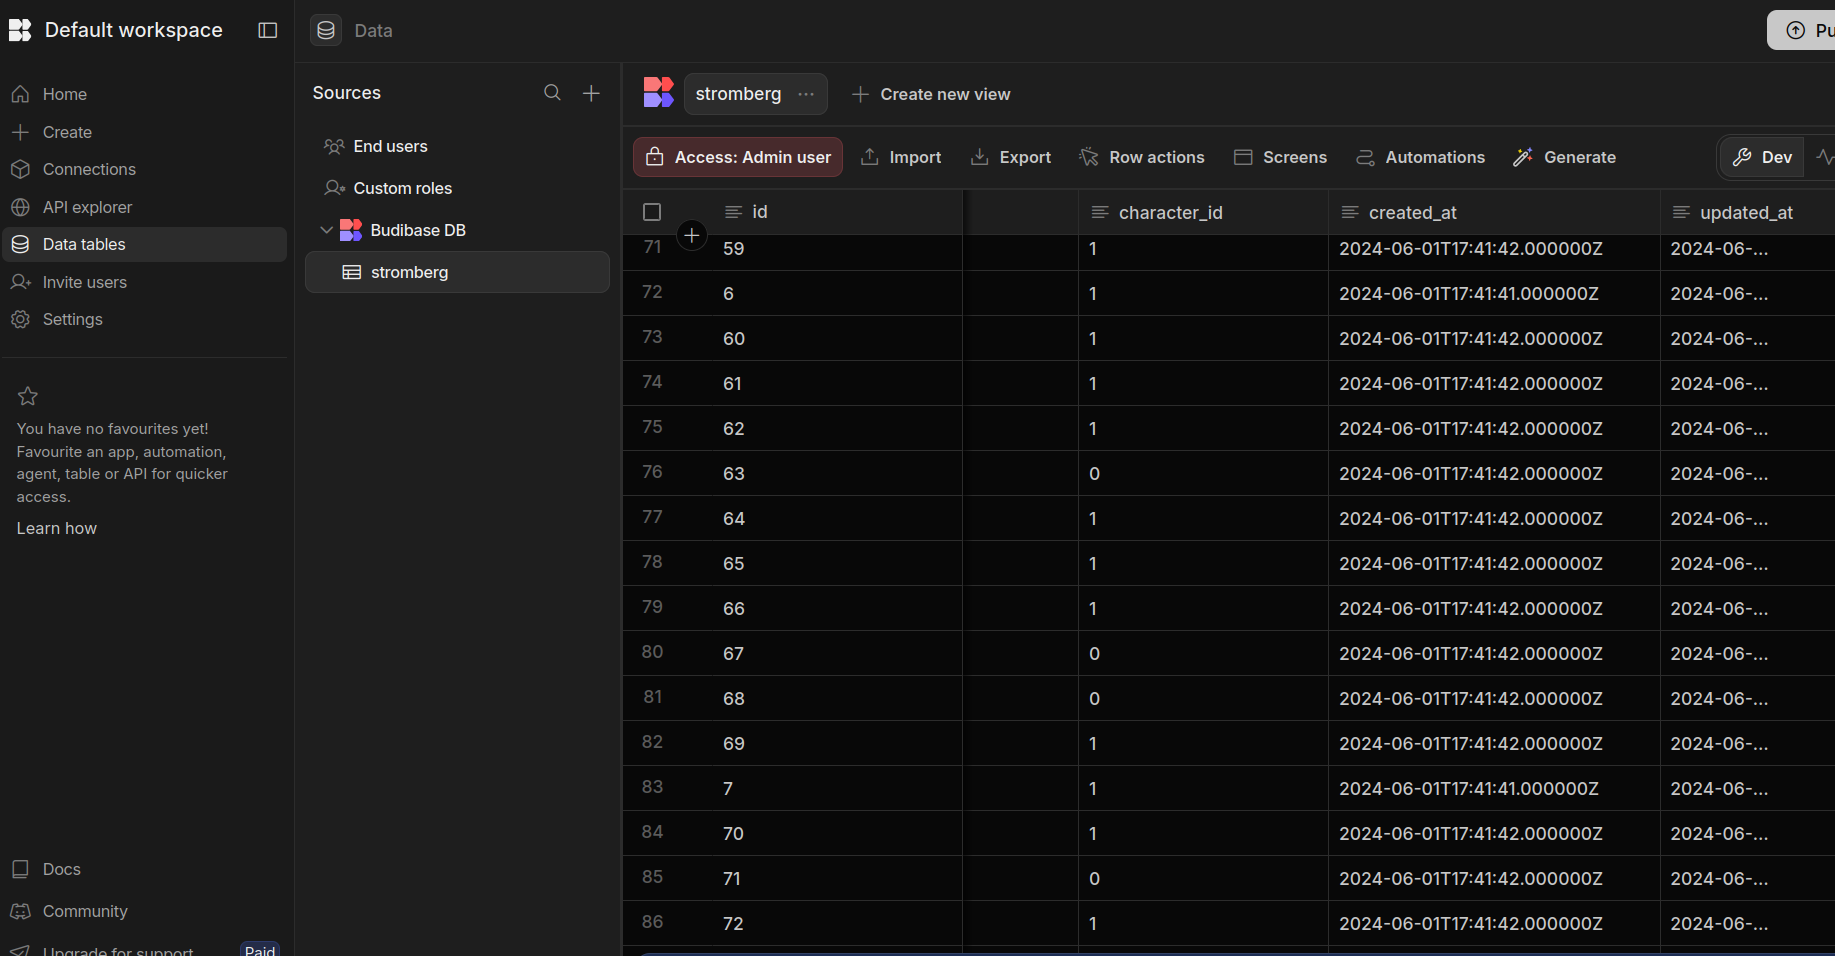
Goal achievement of the use case: 100 %.
Nocobase
Presumably I am simply too impatient or just did not understand the purpose of Nocobase. Anyway I was not able to import my data from the Excel file – no matter via which detours.
Fulfillment of the use case: 0 %.
Baserow
For an import in Baserow we can either copy the data via copy & paste or convert them into a .csv file and then select that.
The import itself looked error-free.
The result was somewhat more cumbersome to achieve and, without further configuration, first looked a bit old-school.
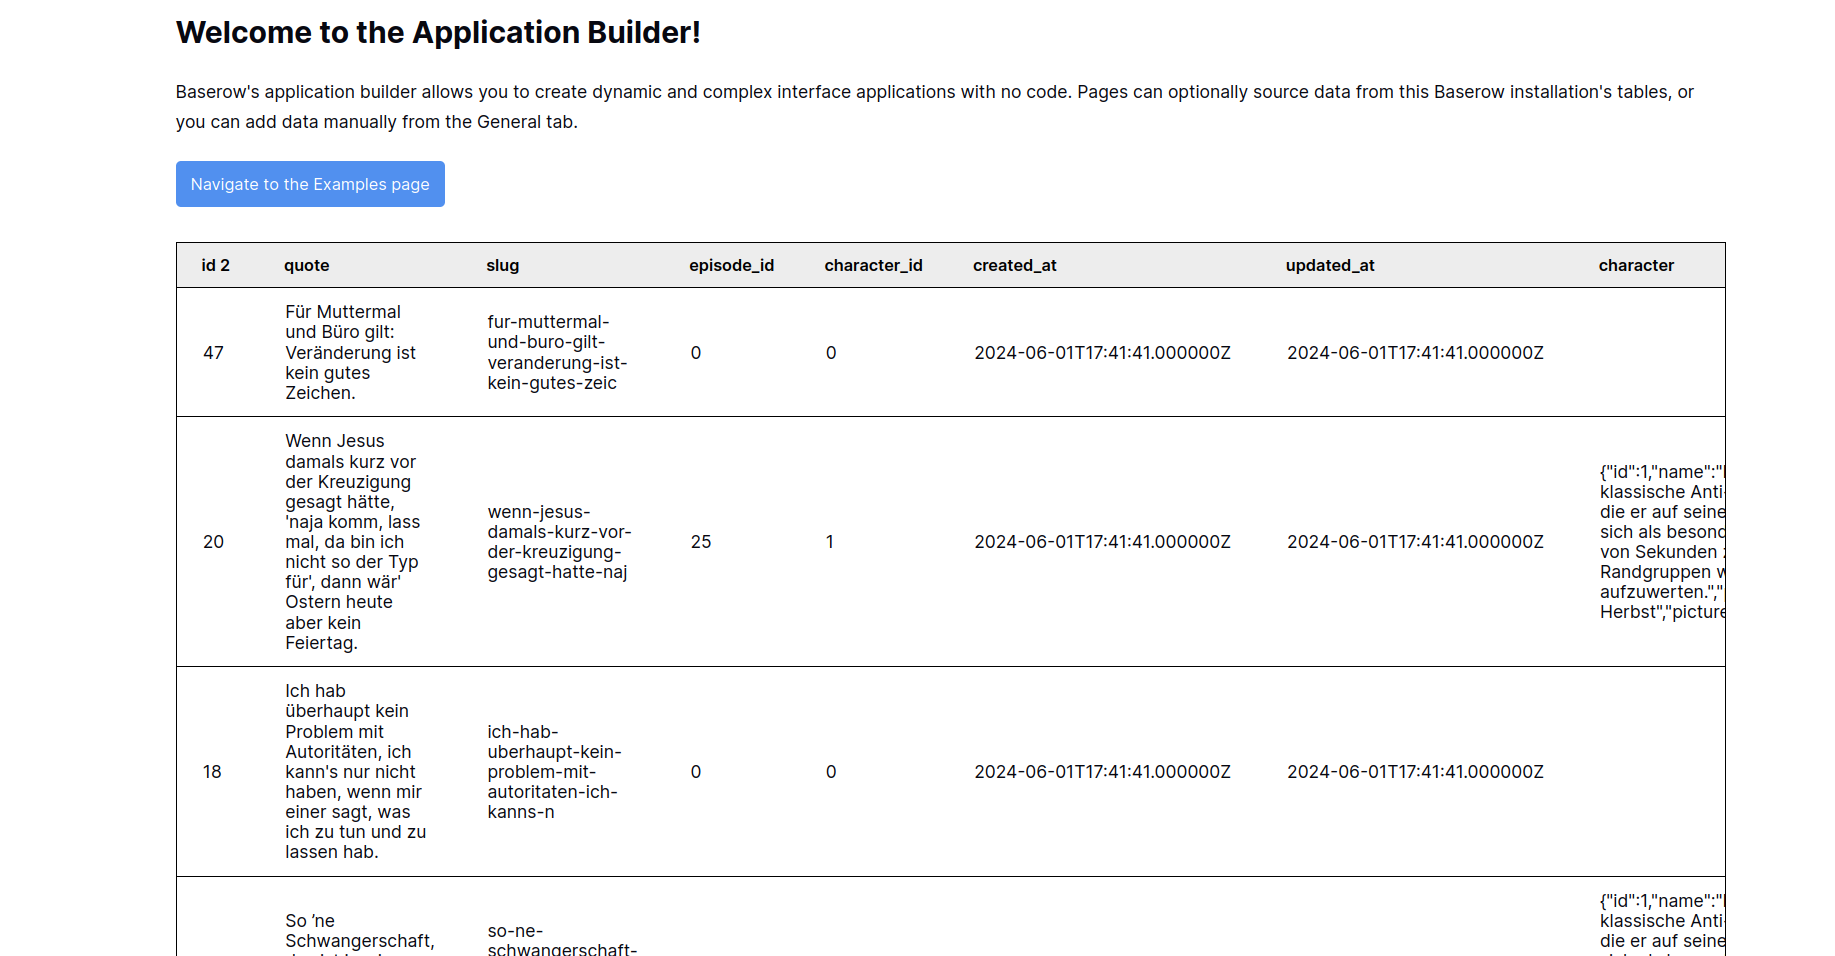
Nevertheless the use case could be fulfilled in a few minutes, so that I come to an overall assessment of 90 %.
Appsmith
In its standard Appsmith shows itself very connection-friendly, but seems not to be made for importing data via its GUI or directly creating new tables via the GUI. SQL statements can be executed, but that was not the goal of the use case.
Because at least theoretically it would be possible with some extra work, there is nevertheless a score of 20 % goal achievement.
Tooljet
In Tooljet the bulk import works via a double detour, but reliably.
First one has to create the headers/data fields in a freely selectable linked database and thereby also define their data types.
Then one can import the Excel file previously manually converted into a .csv file into this table.
Update: Only now I saw that alternatively the user can also process an Excel file directly. With that Tooljet now fulfills 100 % of the criteria.
Summary of the assessment
- Baserow: 90 %
- Budibase: 100 %
- Appsmith: 20 %
- Nocobase: 0 %
- Tooljet: 100 %
Result
| Rank | Tool | Bewertung |
|---|---|---|
| 1. | Budibase | 100 % |
| 1. | Tooljet | 100 % |
| 3. | Appsmith | 58 % |
| 4. | Baserow | 45 % |
| 5. | Nocobase | 0 % |
Referring to my two use cases, Budibase and Tooljet share first place. Since Tooljet gets by with somewhat less advertising, it is perhaps the first point of call to recommend for tests in more complicated scenarios.